Git is a Version Control System that is widely used in software development projects. A VCS helps developers keep track of changes to source code over the course of a project. We use Git for all kinds of projects, not just for managing source code. A solid working knowledge of Git is essential for both researchers and developers in DigInG.
For a comprehensive introduction to Git, check out this tutorial. In this post, we’ll dive right in to using Git.
Installing Git
Your computer may already have Git installed. Try typing the following into the command prompt:
$ git --version
If you see something like git version 2.3.2 (Apple Git-55), you’re good to go. If not, head over to http://git-scm.com and download the latest version for your platform.
Grab a Repository
Each Git-controlled project is contained within a Git repository. We store all of our repositories on GitHub. You can find all of our repositories on the DigInG organization page. We created a special repository called getting-started for this exercise.
To download the getting-started repository, enter the following into the command prompt:
$ git clone https://github.com/diging/getting-started
If all goes well, you should see something like:
Cloning into 'getting-started'...
remote: Counting objects: 3, done.
remote: Total 3 (delta 0), reused 0 (delta 0), pack-reused 0
Unpacking objects: 100% (3/3), done.
Checking connectivity... done.
You should now find a new subdirectory called getting-started in your current working directory. Go ahead and enter that directory before moving on.
$ cd getting-started
You have just cloned the getting-started repository. That means that you have created a local copy of the repository on your computer. You can now make changes to the local repository. When you’re done working, you’ll have to push those changes back up to the repository stored on GitHub.
Create a New Branch
Most projects involve some amount of trial and error. Especially on collaborative projects, it is important to do that experimentation without negatively affecting the work that other people have already done. So before you start making changes in the Git repository that you just downloaded, you should create your own “branch”. You can read all about branching here.
First, find out what branch you’re currently working on. Make sure that you’re inside the repository (getting-started).
$ git status
On branch master
Your branch is up-to-date with 'origin/master'.
nothing to commit, working directory clean
You should see that you’re working on the python branch. Decide on a name for your new branch. It should be something that describes or evokes the changes that you’re going to make in that branch, e.g. an issue or story number. To create a new branch and start working on it, do:
$ git checkout -b your-branch-name
Switched to a new branch 'your-branch-name'
$ git status
On branch your-branch-name
nothing to commit, working directory clean
checkout tells git that you want to switch to a different branch. The -b flag tells git to go ahead and create that branch if it doesn’t already exist.
You can switch back to the master branch using checkout without the -b flag.
$ git checkout master
Switched to branch 'master'
Your branch is up-to-date with 'origin/master'.
manzanita:getting-started erickpeirson$ git status
On branch master
Your branch is up-to-date with 'origin/master'.
nothing to commit, working directory clean
And back to your new branch:
$ git checkout your-branch-name
Switched to branch 'your-branch-name'
Make Some Changes
Now that you’re working on your own branch, go ahead and make some changes. Open up the file README.md in your favorite text editor, and add your name to the Contributors section. Save the file, and switch back to the terminal.
At this point you have modified the README.md file. You can see what files you have modified using git status:
$ git status
On branch your-branch-name
Changes not staged for commit:
  (use "git add <file>..." to update what will be committed)
  (use "git checkout -- <file>..." to discard changes in working directory)

	modified:   README.md

no changes added to commit (use "git add" and/or "git commit -a")
In order for your changes to be stored in the Git repository, you will need to commit those changes. First, you need to tell Git which modified files should be included in your commit. This is called staging. To stage your changes to README.md for your commit, use git add:
$ git add README.md
$ git status
On branch your-branch-name
Changes to be committed:
  (use "git reset HEAD <file>..." to unstage)

	modified:   README.md
Now you can commit your changes. Each commit must be accompanied by a commit message, a short description of the changes that you have made. Commit messages, specified by the -m flag, should be short and sweet.
$ git commit -m "added myself to contributors in README.md"
[your-branch-name 1865082] added myself to contributors in README.md
1 file changed, 6 insertions(+)
Voila! Your changes have been committed.
Pushing Your Commit
In order for your collaborators to see and expand on your work, you’ll need to push your branch and your new commits back up to GitHub.com. To do that, use the push command.
Since you’re working on a new branch that you created locally, you’ll first need to tell Git to replicate that branch in the remote repository. If you just do git push, you’ll get an error message:
$ git push
fatal: The current branch your-branch-name has no upstream branch.
To push the current branch and set the remote as upstream, use

    git push --set-upstream origin your-branch-name
Go ahead and follow the instructions in the error message, and create the “upstream” branch on the remote repository:
$ git push --set-upstream origin your-branch-name
Counting objects: 3, done.
Delta compression using up to 4 threads.
Compressing objects: 100% (2/2), done.
Writing objects: 100% (3/3), 396 bytes | 0 bytes/s, done.
Total 3 (delta 0), reused 0 (delta 0)
To https://github.com/diging/getting-started
 * [new branch]      your-branch-name -> your-branch-name
Branch your-branch-name set up to track remote branch your-branch-name from origin.
Now that your branch exists on both your local repository and the remote repository, you can push any additional commits using git push without the additional flags.
Creating a Pull Request
You should also be able to see your changes on GitHub.com. Go to the repository at https://github.com/diging/getting-started, and click on branches. You should see your branch under “Your branches”:
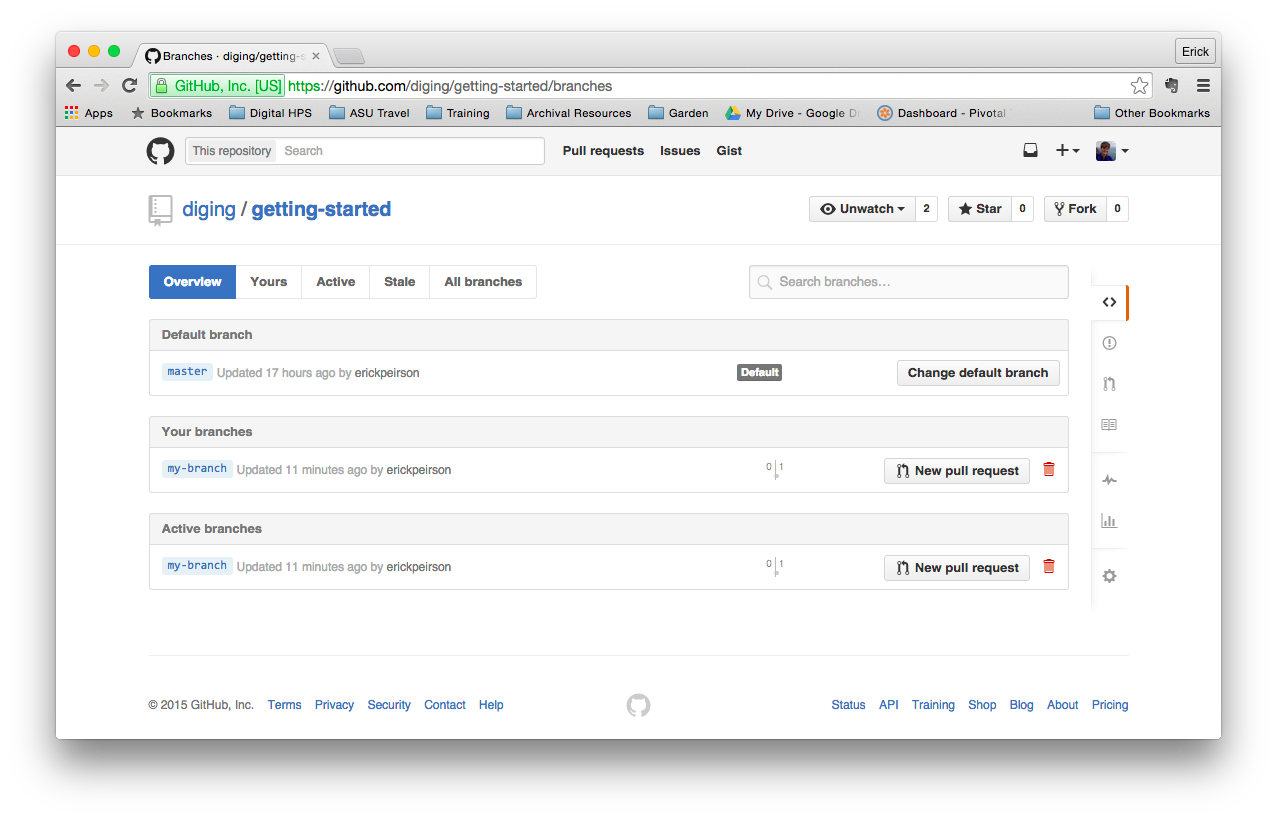
If you click on the name of your branch, you’ll be taken to a page that looks a lot like the front page of the repository. But if you look closely, you’ll see that your branch is selected, and your changes should show up in the README.
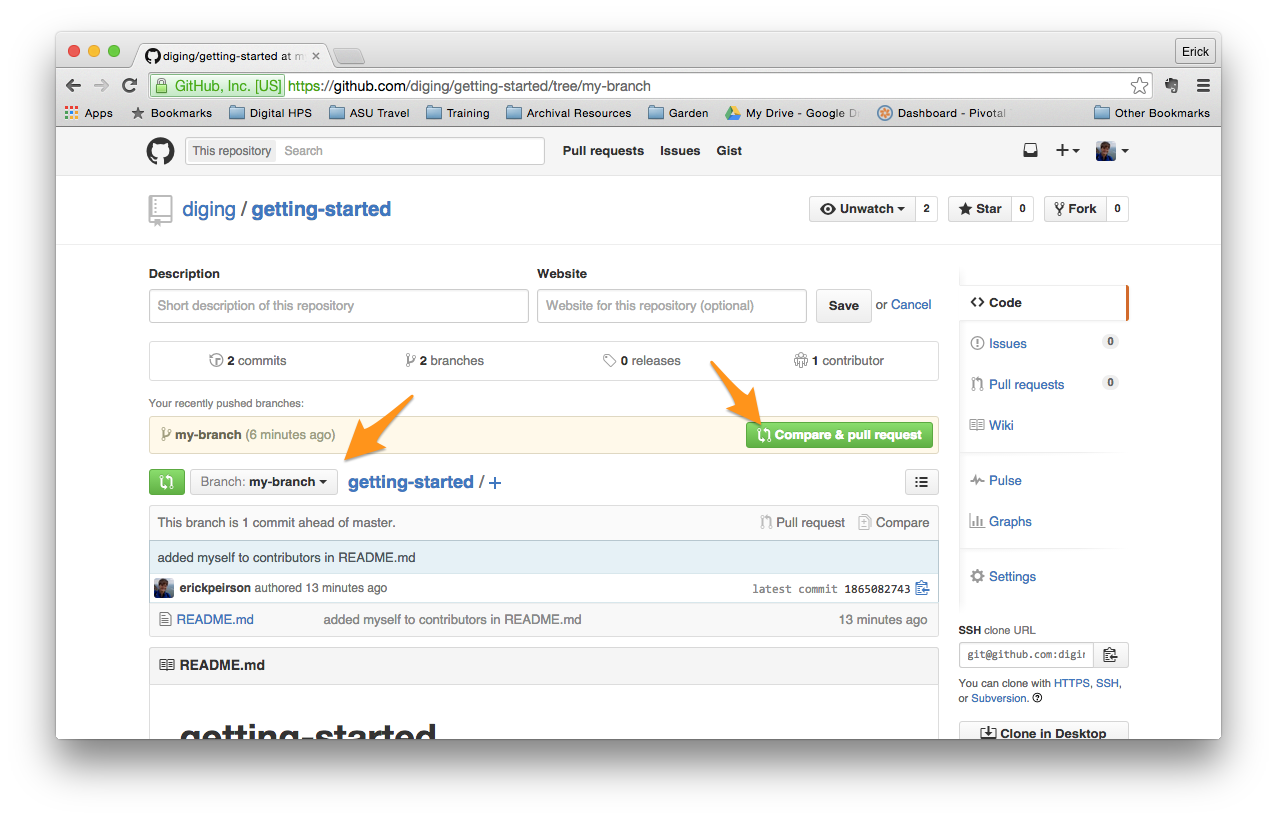
The final step in contributing your changes to the project is to create a pull request. A pull request is essentially a request to merge your branch back into the main project branch. To create a pull request for your branch, click the green “Compare & Pull Request” button. You should be taken to a page that looks something like this:
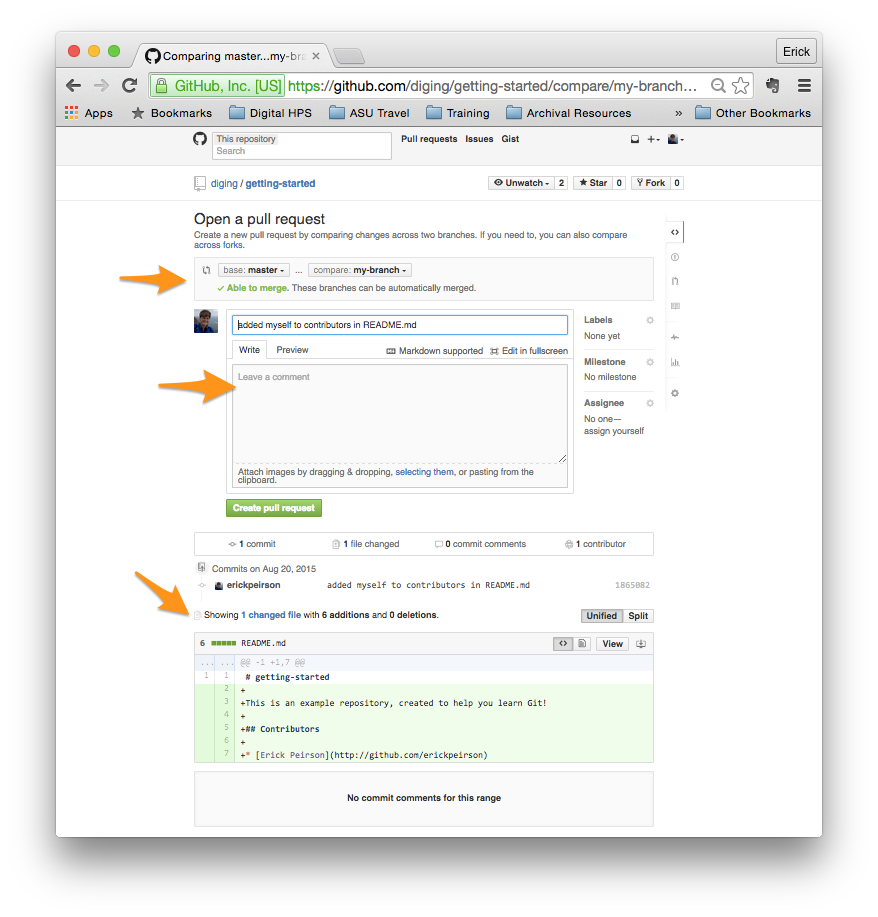
There are several things to notice here. Toward the top, you should see two drop-down menus titled base and compare. The “base” branch is the branch that you want to merge your changes into. The “compare” branch is the branch that contains your changes. GitHub automatically checks to see whether the changes in the “compare” branch can be merged into the “base” branch without creating any conflicts.
Toward the bottom, you should see some details about the differences between the two branches. In the image above, there is just one commit to be merged, containing changes to only 1 file. Below that, you should see a snippet of the README.md file highlighting the changes that you made. The green highlighted lines are the ones that you added. If you had deleted lines, you’d see those in red.
In the middle of the page is a comment field. The title is automatically taken from your last commit. You should also write a longer comment that describes your changes. Once you’ve done that, click the green “Create pull request” button.
If all goes well, you should see something like this:
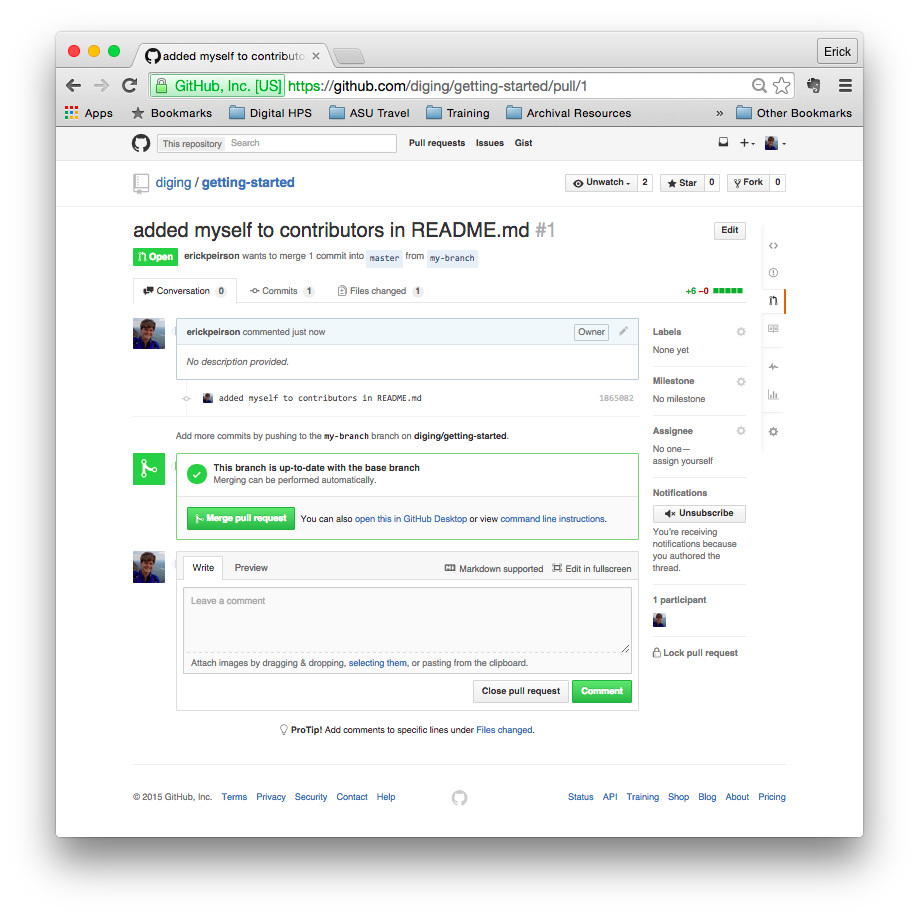
Other participants in the project can now comment on your work, and discuss whether or not your changes should be incorporated into the main branch. It is up to the project owner to click the green “Merge pull request” button (you might not see this button if you don’t have authorization).
Once the pull request has been approved and the branches merged, your pull request page should change to look like this:

Now that your branch has been merged successfully, you can click the “Delete branch” button. For your next contribution, you’ll create an entirely new branch!
Finally, you should go back to your local git repository and switch back to the master branch.
$ git checkout master
Switched to branch 'master'
Your branch is behind 'origin/master' by 2 commits, and can be fast-forwarded.
  (use "git pull" to update your local branch)
Notice that your version of the master branch is now behind, because the version on the server contains the changes that were merged from your branch. To update your version of the master branch, use git pull:
$ git pull
Updating 0c1d6d5..95a06fc
Fast-forward
 README.md | 6 ++++++
 1 file changed, 6 insertions(+)
That’s it!
You’ve successfully contributed to a Git repository on GitHub. When you have time, it’s a good idea to read up on the mechanics of Git. You should also see our notes on our GitHub Workflow.